How to Invite Students to Your Course
This comprehensive guide will walk you through the complete process of creating and managing student invitations for your MagnoliaEd courses.
Getting Started
Step 1: Navigate to Course Invitations
- From the main navigation menu, click on Courses
- Select Invites from the dropdown menu
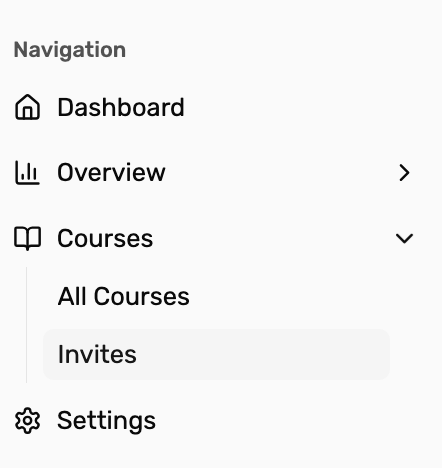
- You’ll be taken to the Course Invites page where you can manage all invitation codes for your courses
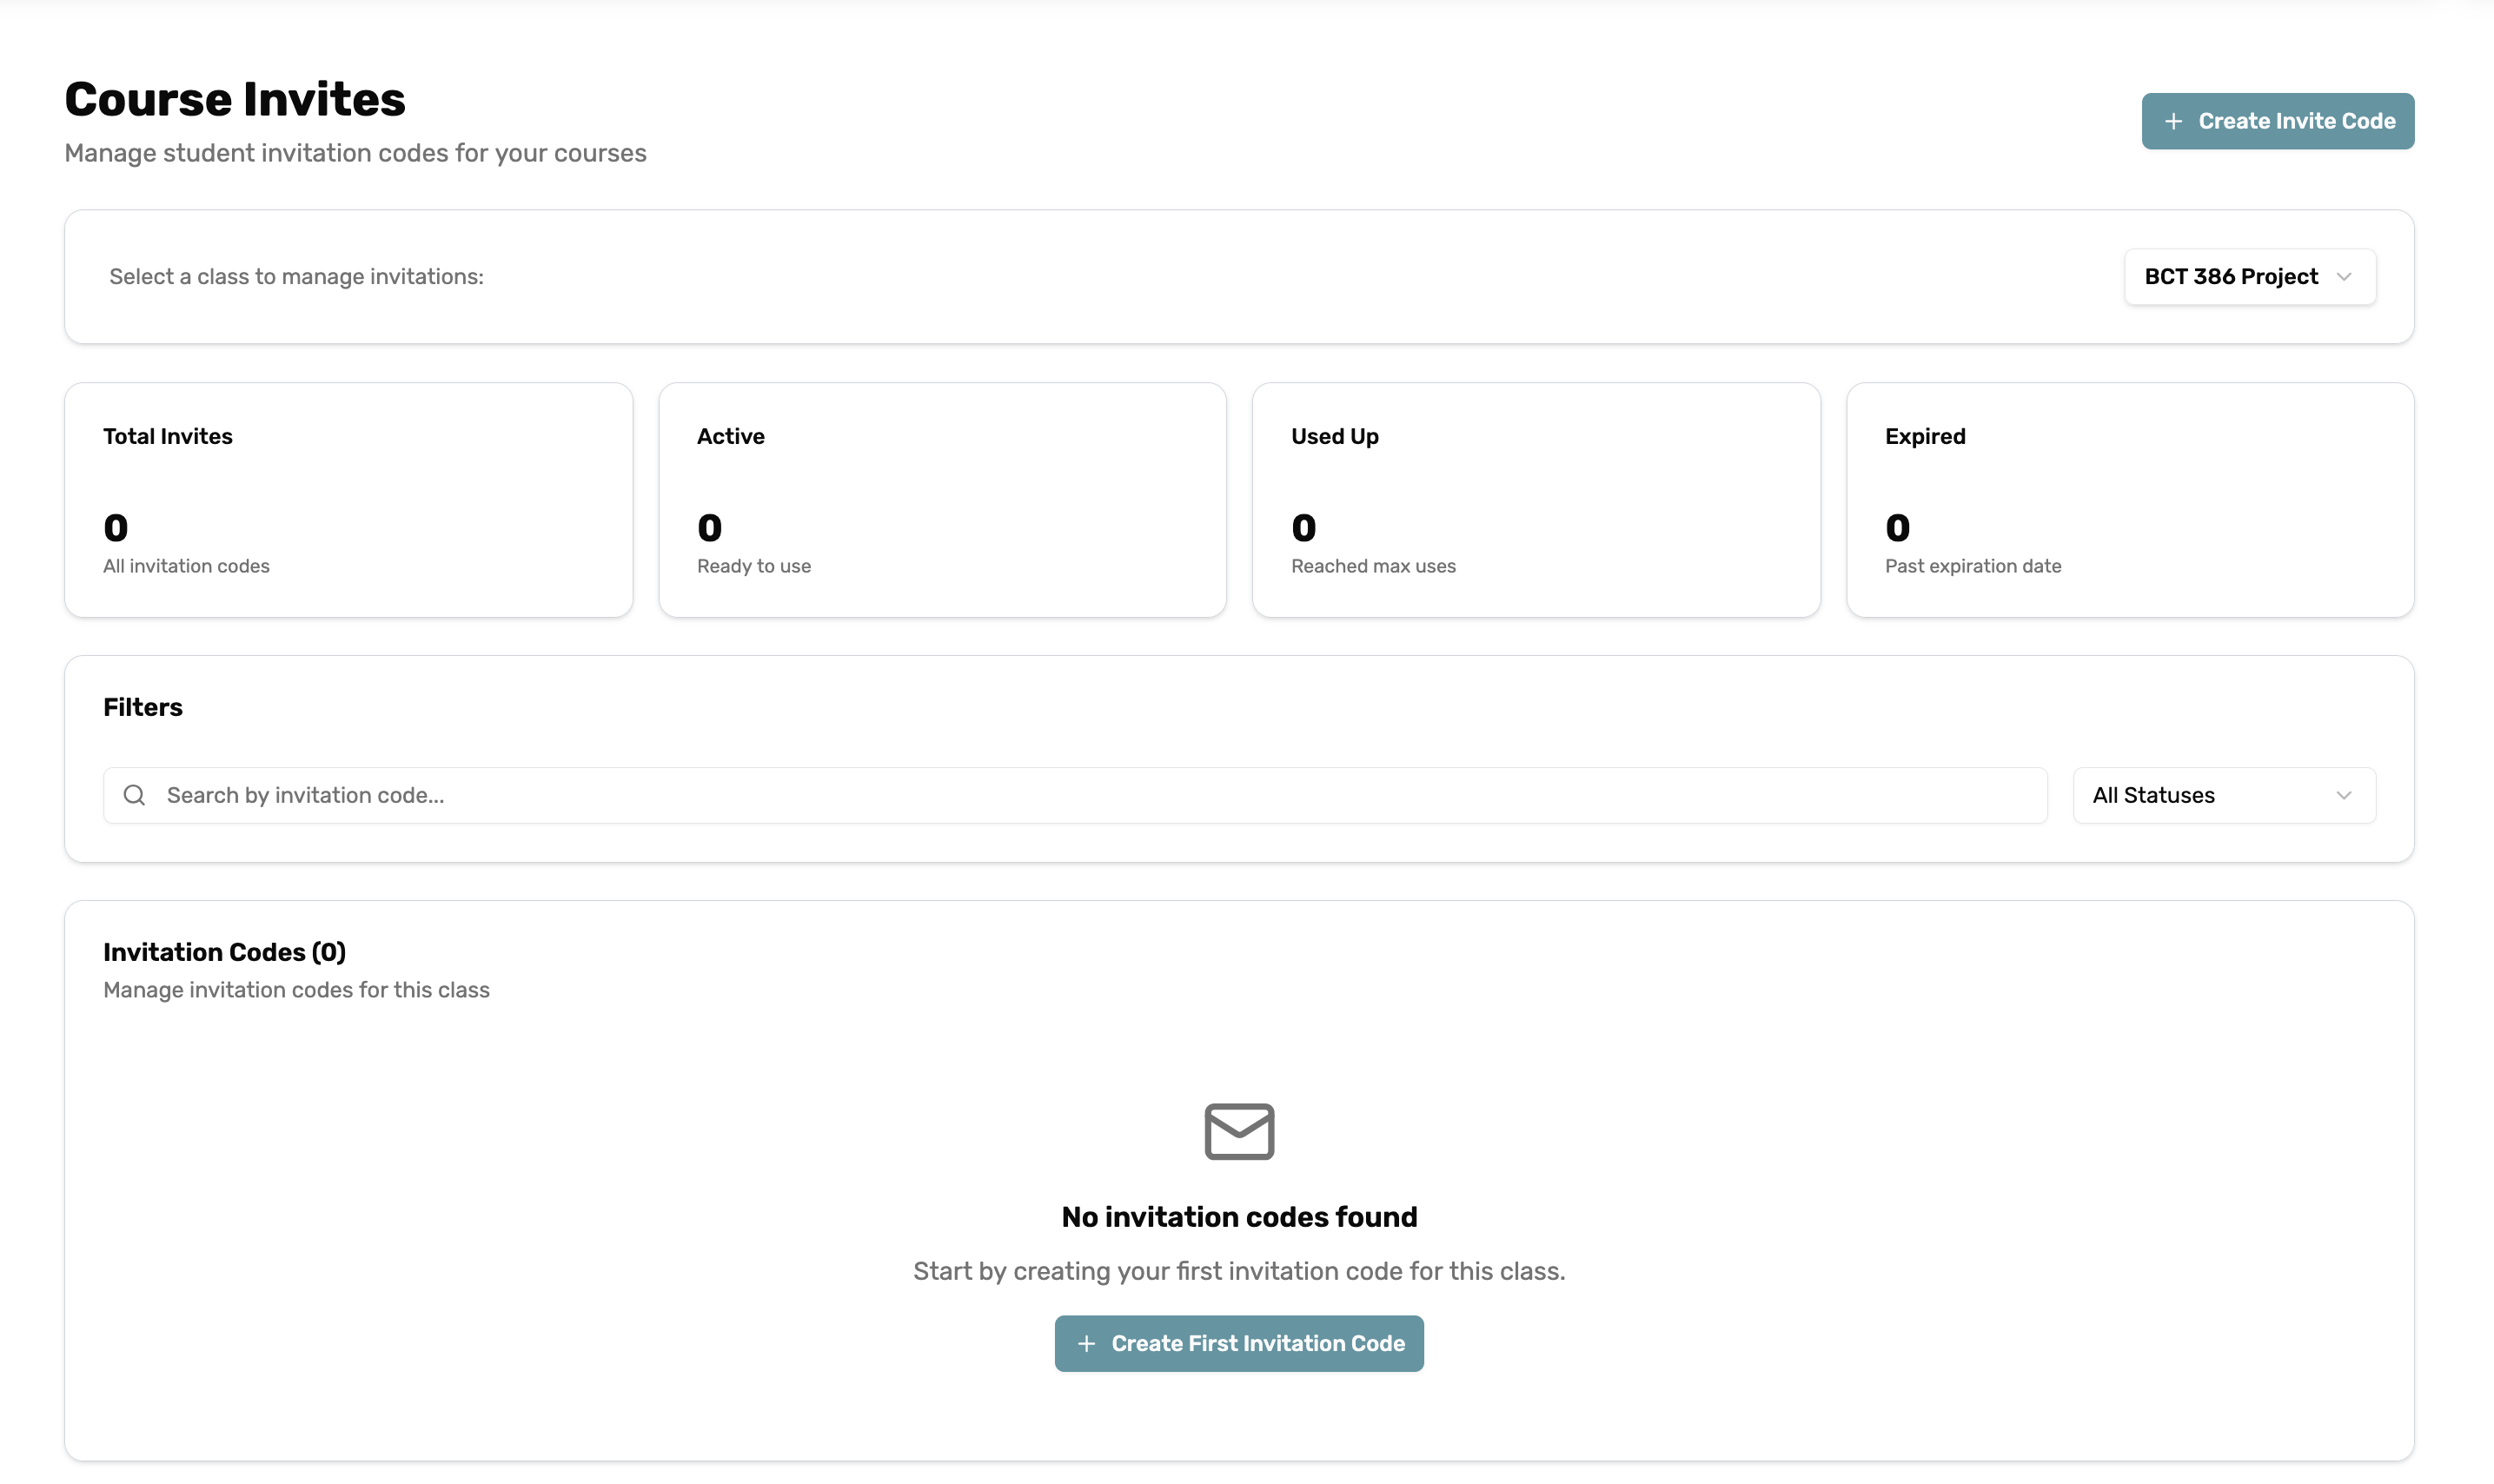
The Course Invites page displays:
- Total Invites: All invitation codes created
- Active: Ready-to-use invitation codes
- Used Up: Codes that have reached maximum enrollment
- Expired: Codes past their expiration date
Step 2: Create a New Invitation
If you don’t have any existing invitations, you’ll see a message saying “No invitation codes found” with a prompt to create your first invitation code.
- Click the “Create Invite Code” button (or “Create First Invitation Code” if this is your first one)
- The “Create Course Invitation” dialog will open
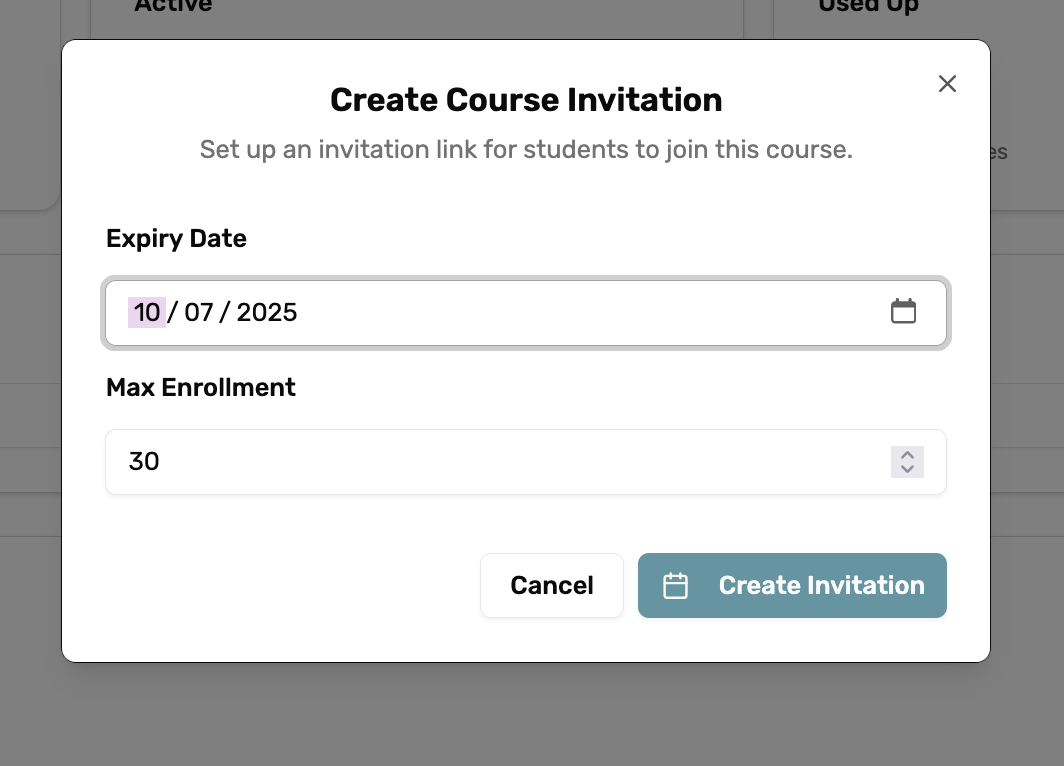
Step 3: Set the Expiry Date
- In the Expiry Date field, you’ll see a default date (format: MM/DD/YYYY)
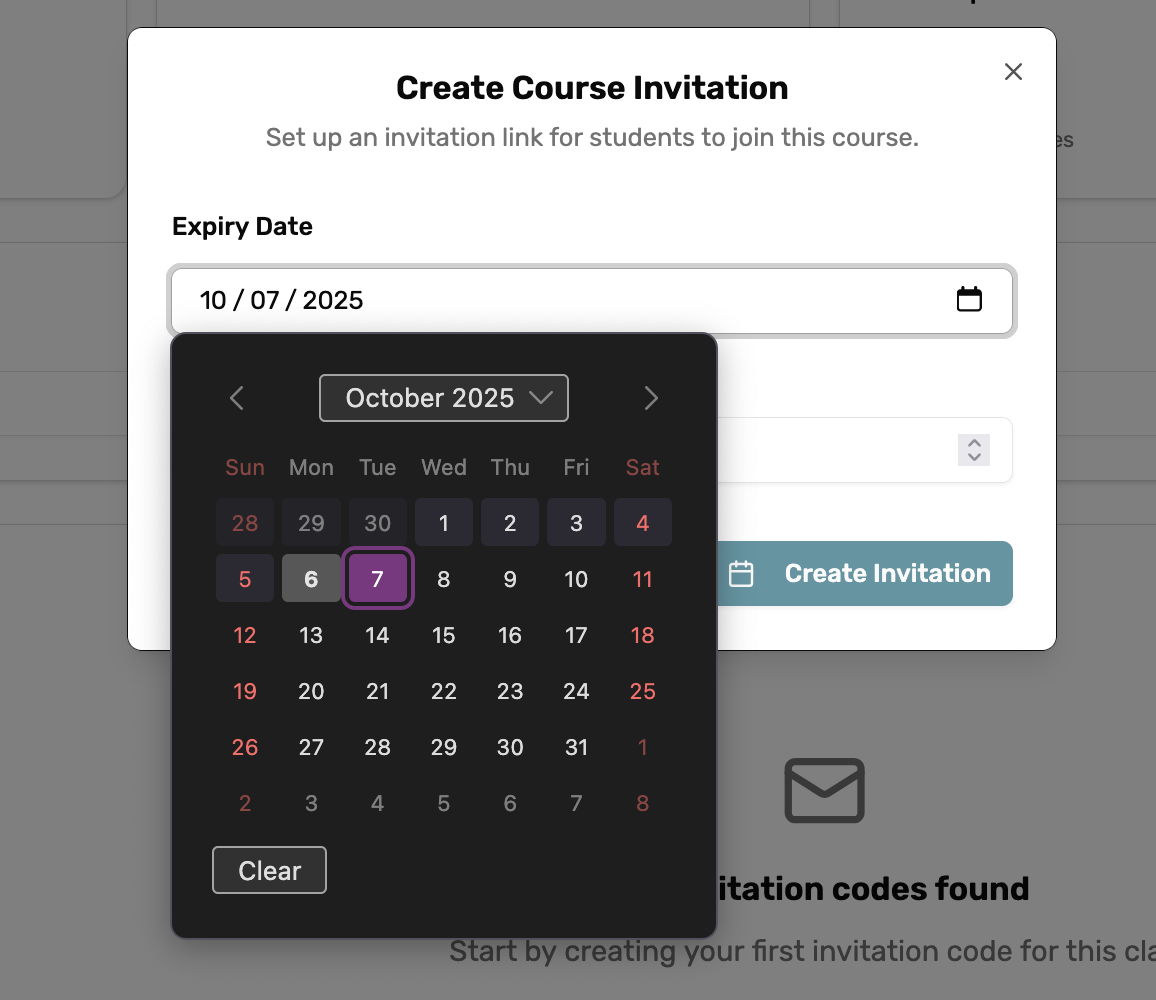
- Click the calendar icon to open the date picker
- Navigate through the calendar using:
- Month/Year dropdown at the top to quickly jump to a specific month
- Arrow buttons to navigate between months
- Date cells to select your desired expiration date
- Click “Clear” if you need to remove the selected date
- Choose a date that gives students adequate time to join your course
Step 4: Set Maximum Enrollment
- In the Max Enrollment field, enter the number of students you want to allow for this invitation
- Use the number input field or the up/down arrows to set your desired limit
- This ensures your class size stays within your preferred limits
Step 5: Create the Invitation
- Review your settings:
- Expiry Date: Confirm the date is correct
- Max Enrollment: Verify the student limit
- Click the “Create Invitation” button to generate your invitation code
Success and Sharing
Step 6: View Your Success Screen
After creating the invitation, you’ll see the “Invitation Created Successfully” dialog containing:

QR Code
- A unique QR code that students can scan with their mobile devices
- Perfect for sharing in classrooms or on printed materials
Invitation Details
- Invitation Code: A unique alphanumeric code (e.g., “QFQ37JGV”)
- Max Uses: The enrollment limit you set
- Expires At: The exact expiration date and time
Download and Share Options
- Download QR Code: Click to save the QR code as an image file for printing or digital sharing
- Copy Code: Click the copy icon next to the invitation code to copy it to your clipboard
- Copy Link: Click the copy icon next to the invitation link to copy the full URL
Step 7: Close and View Your Invitations
- Click “Close” to return to the main Course Invites page
- Your new invitation will now appear in the “Invitation Codes” section
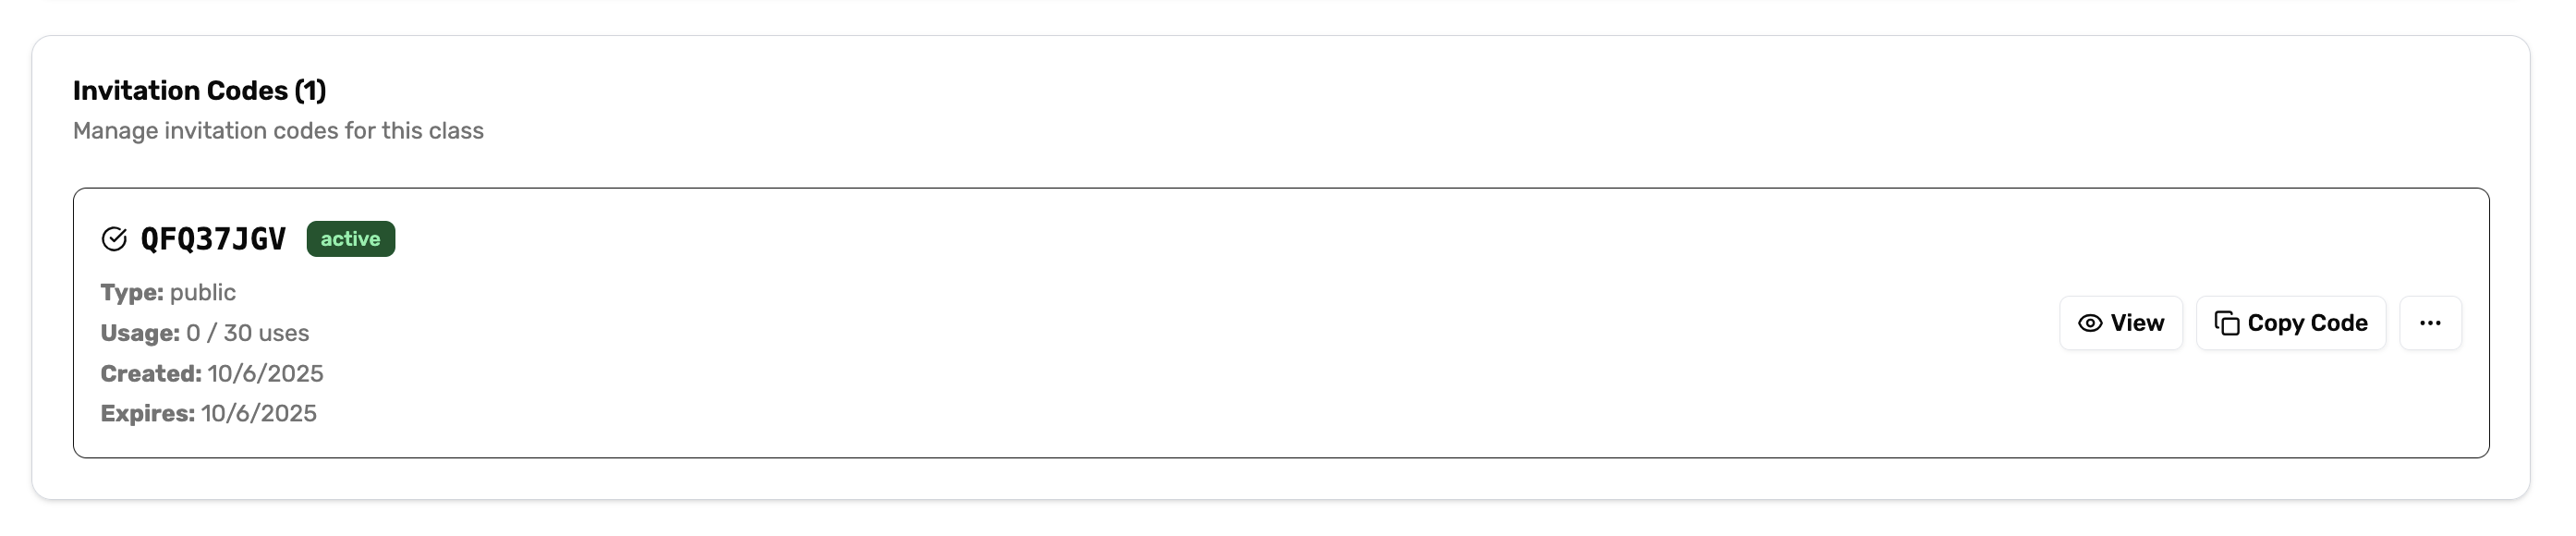
Managing Active Invitations
Viewing Invitation Details
Each active invitation displays:
- Invitation Code: The unique identifier (e.g., “QFQ37JGV”)
- Status Badge: Shows “active” for usable invitations
- Type: Indicates if it’s a “public” invitation
- Usage: Current enrollment vs. maximum (e.g., “0 / 30 uses”)
- Created Date: When the invitation was generated
- Expiry Date: When the invitation will expire
Invitation Actions
For each invitation, you can:
- View: Click to see detailed information about the invitation
- Copy Code: Quick access to copy the invitation code
- More Options: Access additional management features through the menu button
Tracking Student Enrollment
Dashboard Overview
To monitor students who have joined your class:
- Navigate to Dashboard: Click on the Dashboard link in the main navigation
- Check Homepage: View recent activity and enrollment statistics
- Students Section: Access detailed student information and enrollment status

Recent Students Widget
The dashboard includes a “Recent Students” section that shows:
- Student profiles with names and email addresses
- Course enrollment information (e.g., “Eng 101”)
- Status indicators showing active students
- Profile pictures or initials for easy identification
Students who join using your invitation codes will appear here, allowing you to:
- Track successful enrollments
- Monitor class participation
- Identify active students
Last updated on