Step 1: Accessing the Admin Portal
First, navigate to the Admin Portal using the card below. Go to the Users section and click on “Create User”.
Step 2: User Details Form
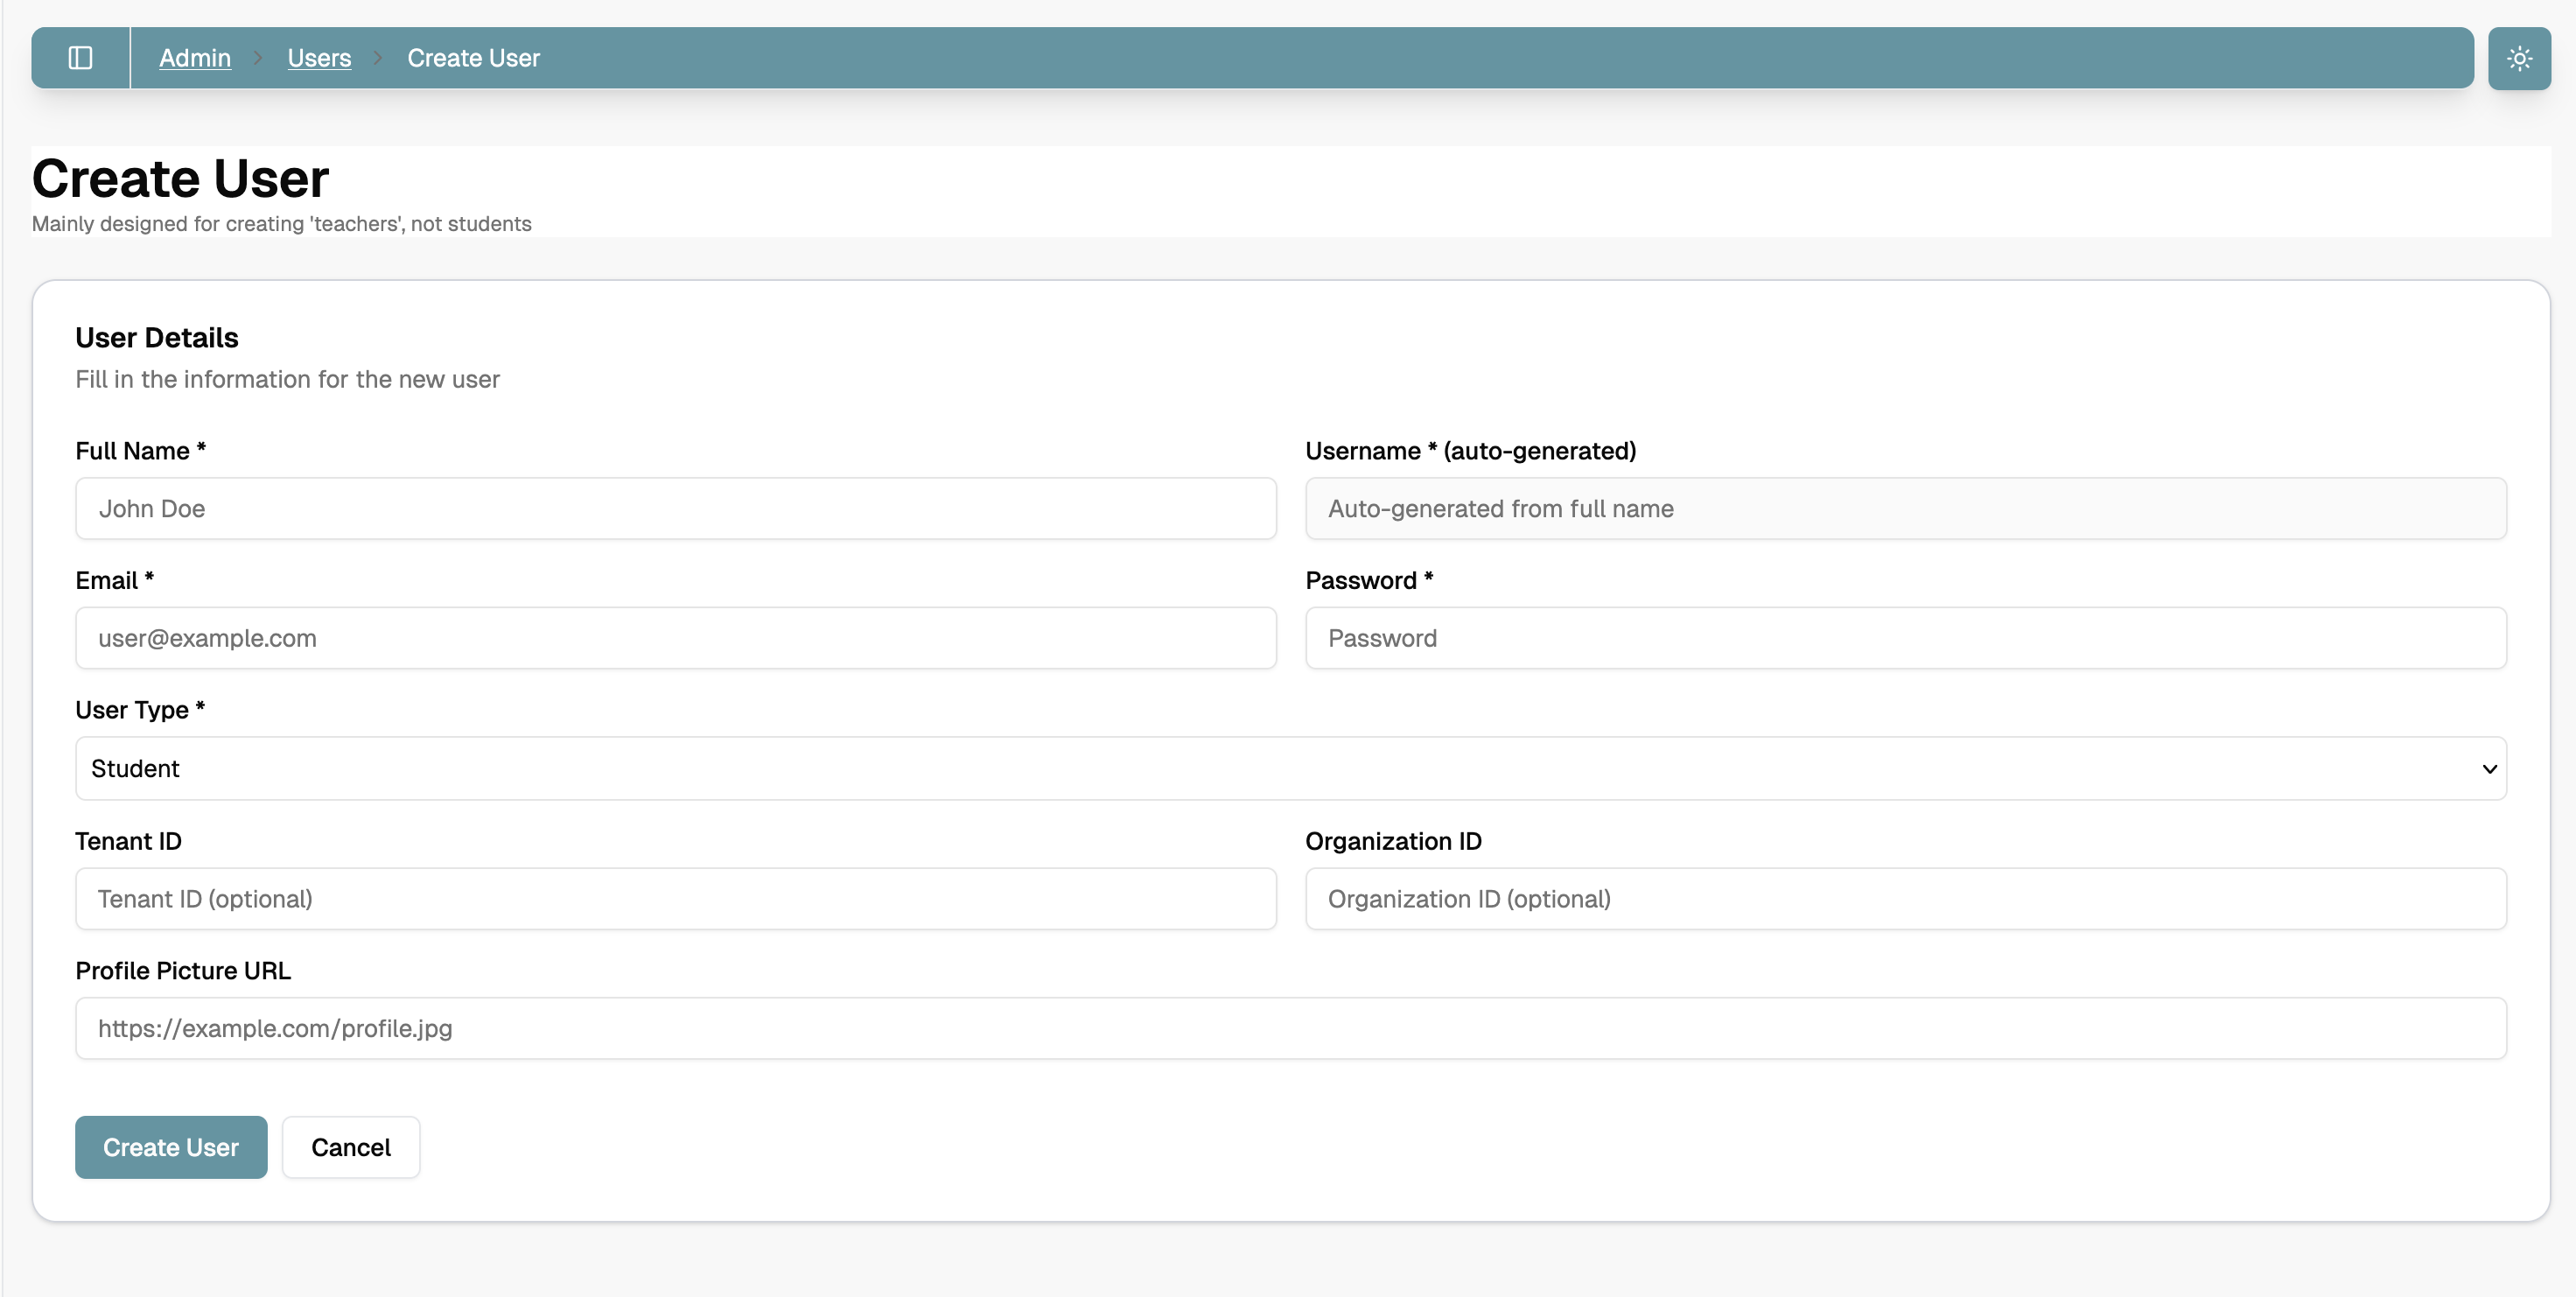
Fill in the information for the new user. The form contains the following fields:
Required Fields
- Full Name (required): Enter the user’s full name (e.g., “John Doe”)
- Username: Auto-generated from the full name
- Email (required): User’s email address (e.g., user@example.com)
- Password (required): Set an initial password for the user
- User Type: Select from the dropdown menu (Student, Teacher, Admin)
Optional Fields
- Tenant ID: Optional identifier for the tenant
- Organization ID: Optional identifier for the organization
- Profile Picture URL: URL to the user’s profile picture (e.g., https://example.com/profile.jpg )
Important Notes
- The username is automatically generated based on the full name entered
- Make sure to use a valid email address as it will be used for account verification
- All fields marked with an asterisk (*) are required
- Tenant ID and Organization ID are optional and can be left blank if not applicable
- The profile picture URL is optional and can be added later
After filling in all required fields, click the “Create User” button. You can also click “Cancel” to discard the changes and return to the users list.
Last updated on